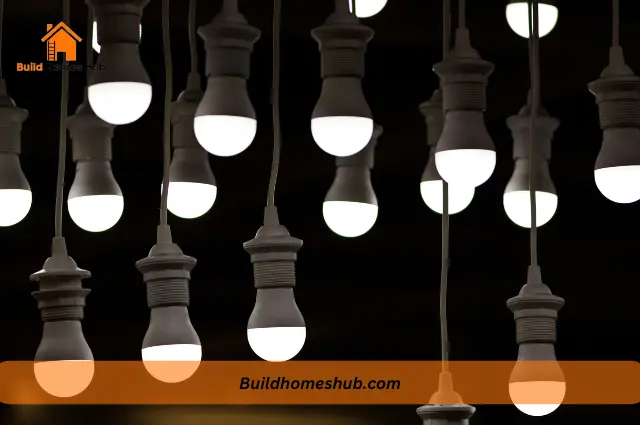
Ceiling lights play a crucial role in illuminating our living spaces, providing both functionality and aesthetics. However, the question of whether ceiling lights need insulation is often raised. Insulation is typically associated with maintaining temperature and energy efficiency, so it is natural to wonder if it is necessary for ceiling lights.
In this article, we will explore the reasons behind insulating ceiling lights, the potential benefits they can offer, and whether it is a practical consideration for homeowners.
Do Ceiling Lights Need Insulation?
No, ceiling lights generally do not require insulation in the traditional sense, as they do not generate enough heat to warrant insulation for thermal purposes. However, insulation around ceiling lights can serve other important functions. It can help prevent air leakage and drafts, improving energy efficiency and reducing heating or cooling costs.
While not a strict necessity, considering insulation for ceiling lights can offer several benefits in terms of energy efficiency, moisture protection, and soundproofing, depending on the specific needs and circumstances of the installation.
5 Reasons to Insulate Your Light Fixtures
1. Energy Efficiency
Insulating your light fixtures can significantly improve energy efficiency. By creating a barrier around the fixture, insulation helps prevent heat loss or gain, ensuring that the desired temperature within the living space is maintained more effectively. This can reduce the need for excessive heating or cooling, resulting in lower energy consumption and cost savings over time.
2. Electrical Safety
Insulation provides an added layer of protection against potential electrical hazards. Light fixtures often contain wiring and electrical components, and insulating them can help prevent contact with combustible materials or accidental electrical shocks. Insulation acts as a barrier, reducing the risk of fire or electrical accidents, and promoting a safer environment for you and your loved ones.
3. Moisture Control
Moisture infiltration can cause damage to light fixtures, especially in areas prone to high humidity or moisture buildup, such as bathrooms or kitchens. Insulation can help create a barrier that prevents moisture from seeping into the fixture, protecting it from corrosion, short circuits, and potential malfunctions. By keeping moisture at bay, insulation extends the lifespan of your light fixtures and reduces the need for frequent replacements or repairs.
4. Soundproofing
Insulating light fixtures can contribute to soundproofing efforts within your home. By sealing gaps and minimizing air passage, insulation helps reduce noise transmission through the ceiling. This can be particularly beneficial in areas where noise isolation is desired, such as bedrooms, home offices, or entertainment rooms. Insulation helps create a quieter and more peaceful living environment by blocking unwanted noise from above.
5. Fire Protection
Insulating your light fixtures can act as a fire barrier, helping to contain fires within the fixture itself and preventing them from spreading further. Insulation materials with fire-resistant properties can slow down the spread of flames and minimize the potential damage caused by a fire. This added protection can buy valuable time for occupants to evacuate safely and for emergency responders to arrive and mitigate the situation.
How to Insulate Ceiling Lights
Insulating ceiling lights can be a relatively straightforward process. Here are the general steps to follow:
1. Turn off the power
Before starting any work on electrical fixtures, it is essential to turn off the power supply to the light fixture at the circuit breaker or fuse box. This ensures your safety while working on the insulation.
2. Remove the light fixture cover
Unscrew or unclip the cover of the ceiling light fixture to access the interior. This will expose the electrical components and wiring.
3. Install insulation material
Cut insulation material, such as fiberglass or foam insulation, to fit around the light fixture. Ensure that there is sufficient clearance between the insulation and the fixture to avoid any direct contact that could cause overheating.
4. Secure the insulation
Carefully fit the insulation material around the fixture, ensuring that it covers all sides and gaps. You may use tape or insulation supports to hold it in place securely. Make sure not to block any ventilation openings or obstruct the airflow around the fixture.
4. Reattach the light fixture cover
Once the insulation is in place, reattach the light fixture cover, ensuring that it is properly aligned and securely fastened.
5. Turn on the power
After completing the insulation, restore the power supply to the light fixture by switching on the circuit breaker or fuse. Test the light to ensure it is functioning correctly.
Note that, specific light fixtures, such as recessed or can lights, may have specific insulation requirements. Always consult the manufacturer’s instructions or guidelines to ensure proper insulation practices and avoid any potential safety hazards.
If you are uncertain or uncomfortable with performing the insulation yourself, it is recommended to seek assistance from a qualified electrician who can ensure proper insulation and address any specific considerations related to your ceiling lights.
What Insulation Is Flammable With Recessed Lighting?
When it comes to insulation materials that are flammable with recessed lighting, the key concern is the proximity of the insulation to the light fixture itself. The risk arises when insulation comes into direct contact with the heat-producing components of the recessed light, such as the bulb or housing.
Certain types of insulation are more prone to flammability when in close contact with recessed lighting, including:
1. Cellulose insulation
Cellulose insulation is made from recycled paper or wood fibers and is treated with fire retardant chemicals to enhance its fire resistance. While treated cellulose insulation is generally considered safe with recessed lighting, it is crucial to follow the manufacturer’s guidelines for proper installation and clearance around the fixtures.
2. Loose-fill fiberglass insulation
Fiberglass insulation consists of tiny glass fibers and is often installed as loose-fill or blown-in insulation. While fiberglass itself is not highly flammable, if it comes into direct contact with recessed lighting, the heat produced by the fixtures can pose a fire risk. It is important to maintain a sufficient clearance between the insulation and the fixtures to avoid potential issues.
Conclusion
In conclusion, while the necessity of insulating ceiling lights may vary depending on specific circumstances, it is generally advisable to consider insulation for optimal energy efficiency and safety.
Insulating ceiling lights can help prevent heat loss, reduce energy consumption, and minimize the risk of electrical hazards. Furthermore, proper insulation can contribute to a more comfortable indoor environment by maintaining consistent temperatures. Although the insulation process may require some additional effort and investment, the long-term benefits justify the consideration.
I hope to help you make the right choices with my content. I am passionate about building new homes and renovations. Follow me, on my socials, I drop nice stuff that may be helpful.

